Embroidery on hats is a popular way to add a personalized touch to your headwear. Whether you’re looking to create a custom design, promote a brand, or simply enhance the aesthetic appeal of a hat, embroidery can be a great option. In this article, we will explore different embroidery design ideas for hats, discuss various techniques, provide design inspiration, and share tips for successful hat embroidery.
Key Takeaways
- Understanding hat styles, materials, and colors is important when choosing the right hat for embroidery.
- Hand embroidery, machine embroidery, and embroidery patch application are common techniques for hat embroidery.
- Nature-inspired designs, geometric patterns, and personalized text embroidery are popular design inspirations for hat embroidery.
- Choosing the right embroidery thread, preparing the hat properly, and considering embroidery placement and sizing are essential for successful hat embroidery.
Choosing the Right Hat for Embroidery
Understanding Hat Styles
When it comes to embroidery, choosing the right hat style is crucial. Different hat styles offer unique opportunities for embroidery designs. Here are some popular hat styles that work well with embroidery:
- Baseball Caps: These classic caps are a popular choice for embroidery due to their large front panels. They provide ample space to showcase intricate designs.
- Beanies: Beanies are a great option for embroidery, especially for winter-themed designs. The compact size of beanies allows for smaller, more detailed embroidery.
- Bucket Hats: Bucket hats have a wide brim that offers a larger canvas for embroidery. They are perfect for bold and eye-catching designs.
- Trucker Hats: Trucker hats have a mesh back and a foam front panel, making them ideal for embroidery. The foam front provides a stable surface for embroidery, while the mesh back keeps the hat breathable.
When choosing a hat style for embroidery, consider the design you want to showcase and the overall look you want to achieve.
Considerations for Hat Material
When choosing the material for your embroidered hat, there are a few important factors to consider:
- Durability: The material should be sturdy and able to withstand regular wear and tear. Look for materials like cotton twill or polyester that are known for their durability.
- Breathability: It’s important to choose a material that allows air to circulate, keeping your head cool and comfortable. Natural fibers like cotton or linen are great options for breathability.
- Color Fastness: Ensure that the material is colorfast, meaning it won’t fade or bleed when exposed to water or sunlight. This is especially important if you plan to wash your hat frequently.
- Texture: Consider the texture of the material and how it will affect the overall look of your embroidery. Smooth materials like satin or silk can give a more elegant and refined appearance, while textured materials like denim or canvas can add a casual and rugged feel.
Remember, the material you choose will not only impact the look and feel of your embroidered hat but also its longevity and comfort.
Selecting the Perfect Hat Color
When choosing the perfect hat color for embroidery, it’s important to consider the overall aesthetic you want to achieve. Bold and vibrant colors can make a statement and draw attention, while subtle and muted colors can create a more sophisticated and elegant look.
One way to select the right hat color is to consider the color palette of the embroidery design. Complementary colors can create a visually pleasing contrast, while analogous colors can create a harmonious and cohesive look.
Another factor to consider is the intended use of the hat. For casual and everyday wear, neutral colors like black, white, or gray can be versatile and easy to match with different outfits. For special occasions or events, you may opt for bolder colors that complement the theme or style.
Remember, the hat color should enhance the embroidery design and not overpower it. It’s important to find the right balance between the color of the hat and the colors used in the embroidery design.
Embroidery Techniques for Hats
Hand Embroidery
Hand embroidery is a traditional and intricate technique that allows for a high level of detail and customization. It involves stitching designs onto the hat fabric using a needle and thread. Attention to detail is key in hand embroidery, as each stitch is carefully placed to create the desired design.
One advantage of hand embroidery is the ability to use a wide variety of stitches to create different textures and patterns. Some popular stitches used in hat embroidery include backstitch, satin stitch, and French knot. These stitches can be combined to create unique and visually appealing designs.
When working on a hand embroidery project, it’s important to use the right materials. High-quality embroidery floss is recommended, as it ensures vibrant colors and durability. Additionally, using an embroidery hoop can help keep the fabric taut and prevent puckering or distortion of the design.
To get started with hand embroidery, follow these steps:
- Choose a design or pattern for your hat embroidery.
- Transfer the design onto the hat fabric using a water-soluble pen or transfer paper.
- Secure the fabric in an embroidery hoop.
- Select the appropriate embroidery floss colors for your design.
- Begin stitching the design, starting with the outline and then filling in the details.
Tip: Practice your stitches on a scrap piece of fabric before starting on the actual hat to ensure you’re comfortable with the technique and achieve the desired results.
Machine Embroidery
Machine embroidery is a popular technique for adding intricate designs to hats. With the use of computerized machines, it allows for precise and detailed stitching. High-quality embroidery machines offer a wide range of thread colors and stitch patterns, giving you endless possibilities for your hat designs.
When using machine embroidery, it is important to consider the hoop size and placement on the hat. The hoop size should be compatible with the hat’s dimensions to ensure a smooth and even stitching process. Additionally, proper placement is crucial to achieve a visually appealing design.
To achieve the best results with machine embroidery, it is recommended to use stabilizers. Stabilizers provide support and prevent the fabric from puckering or stretching during the embroidery process. There are different types of stabilizers available, such as tear-away, cut-away, and water-soluble, each suitable for different fabrics and designs.
Incorporating machine embroidery into your hat designs can elevate them to a whole new level. The precision and versatility of machine embroidery allow you to create unique and eye-catching designs that will surely impress.
Embroidery Patch Application
Embroidery patch application is a popular technique for adding decorative elements to hats. Patches are pre-made designs that can be attached to the hat using various methods. One common method is sewing the patch onto the hat, either by hand or using a sewing machine. Another method is ironing the patch onto the hat using heat-activated adhesive. This method is quick and easy, but it may not be as durable as sewing. Velcro patches are also available, allowing for easy attachment and removal. When applying patches, it’s important to consider the placement and alignment to ensure a professional and visually appealing result.
Here are some tips for applying embroidery patches:
- Clean the hat surface before applying the patch to ensure proper adhesion.
- If sewing the patch, use a thread color that matches or complements the patch design.
- When ironing the patch, follow the manufacturer’s instructions for temperature and duration.
Tip: If you’re unsure about the best method for attaching a patch, test it on a small, inconspicuous area of the hat first to ensure it adheres properly and doesn’t damage the hat material.
Design Inspiration for Hat Embroidery
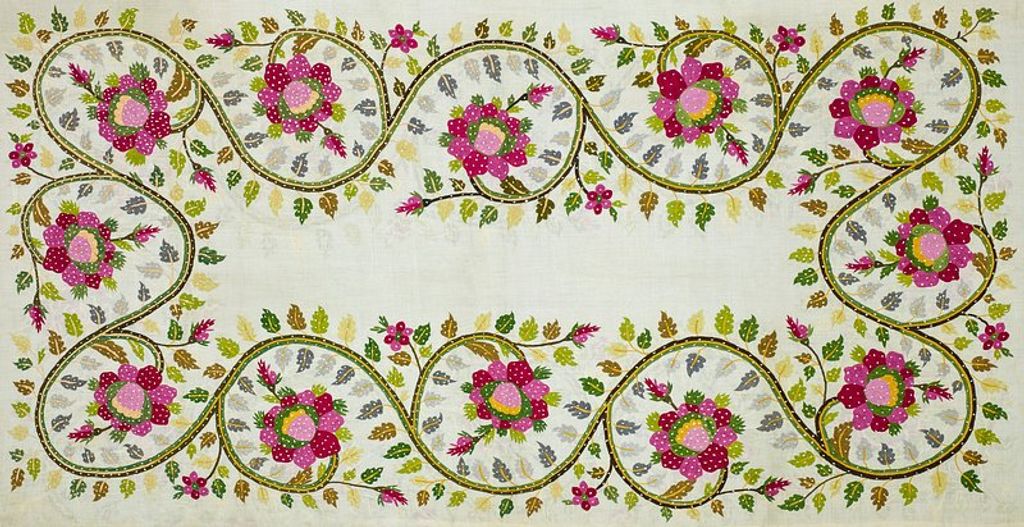
Nature-Inspired Designs
When it comes to embroidery designs for hats, nature-inspired motifs are a popular choice. Floral patterns, animal motifs, and leaf designs can add a touch of natural beauty to any hat. These designs can be embroidered using a variety of techniques, such as satin stitch, backstitch, or French knots.
To create a cohesive look, consider using colors that are commonly found in nature, such as earth tones or pastel shades. You can also experiment with different thread colors to add depth and dimension to your embroidery.
If you’re looking for inspiration, take a walk in the park or spend some time in your garden. Observe the intricate details of flowers, leaves, and animals, and incorporate them into your embroidery designs.
Here are a few nature-inspired design ideas for hat embroidery:
- Delicate roses with intricate petals
- Whimsical butterflies in vibrant colors
- Tropical palm leaves for a beachy vibe
- Adorable pandas for a cute and playful touch
Remember, nature-inspired designs can be versatile and can suit a variety of hat styles, from baseball caps to wide-brimmed sun hats. Let your creativity flow and bring the beauty of nature to your hat embroidery projects!
Geometric Patterns
Geometric patterns are a popular choice for hat embroidery. These patterns are characterized by their use of simple shapes and lines, creating a clean and modern look. Triangles, circles, squares, and diamonds are commonly used in geometric designs. They can be arranged in various ways to create visually interesting compositions.
When choosing geometric patterns for hat embroidery, consider the size and shape of the hat. Small and intricate geometric designs work well on fitted caps, while larger and bolder patterns can be used on wide-brimmed hats.
To add depth and dimension to your geometric patterns, consider using different embroidery techniques. Satin stitch and backstitch are commonly used to outline and fill in the shapes, while cross-stitch can be used to add texture and detail.
Remember to experiment with different color combinations to make your geometric patterns stand out. Contrasting colors can create a bold and eye-catching effect, while monochromatic schemes can give a more subtle and sophisticated look.
Personalized Text Embroidery
Personalized text embroidery is a popular choice for adding a unique touch to hats. Whether you want to showcase your name, a special message, or a favorite quote, boldtext embroidery allows you to express your individuality. It’s a great way to make a statement and stand out from the crowd.
When creating personalized text embroidery, there are a few things to keep in mind. First, choose a font that complements the style of the hat and the message you want to convey. Italicizedfonts can add a subtle emphasis to the text, while bold fonts make a bolder statement.
To ensure the text is legible and well-placed, consider the size and placement of the embroidery. ItalicizedSmaller fonts may be harder to read, especially on hats with a busy pattern or texture. Experiment with different sizes and positions to find the perfect balance.
If you’re looking for inspiration, consider using a Markdown table to showcase different font options and their corresponding styles. This can help you visualize how the text will look on the hat and make an informed decision.
Remember, personalized text embroidery is all about adding a personal touch to your hat. Have fun with it and let your creativity shine!
Tips for Successful Hat Embroidery
Choosing the Right Embroidery Thread
When it comes to choosing the right embroidery thread for your hat designs, there are a few factors to consider. First, you’ll want to think about the color of the thread and how it will complement the hat’s overall design. It’s important to choose a thread color that will stand out and enhance the embroidery without overpowering it.
Next, consider the type of thread you’ll be using. Polyester thread is a popular choice for hat embroidery due to its durability and colorfastness. It’s also important to select a thread that is compatible with your embroidery machine or suitable for hand embroidery.
In addition to color and type, you’ll also want to consider the weight of the thread. Thicker threads can create a bold and textured look, while thinner threads are better suited for intricate details and smaller designs.
Remember, the right embroidery thread can make a significant difference in the final result of your hat embroidery. Take the time to choose wisely and experiment with different options to achieve the desired effect.
Preparing the Hat for Embroidery
Before starting the embroidery process, it is important to properly prepare the hat to ensure the best results. Here are some key steps to follow:
- Clean the Hat: Before embroidering, make sure the hat is clean and free from any dirt or debris. This will help the embroidery design adhere better to the fabric.
- Stabilize the Hat: To prevent the hat from shifting during embroidery, it is essential to stabilize it. This can be done using a hat hoop or by using stabilizer materials such as tear-away or cut-away stabilizers.
- Positioning the Design: Carefully decide where you want the embroidery design to be placed on the hat. Consider factors such as the hat style and the desired visibility of the design.
- Secure the Hat: To ensure the hat stays in place during the embroidery process, it is recommended to secure it to the embroidery machine or hoop using clips or adhesive tape.
Remember, proper preparation is key to achieving a professional-looking embroidered hat.
Embroidery Placement and Sizing
When it comes to embroidery placement and sizing on hats, there are a few key considerations to keep in mind. Placement is crucial to ensure that the design is visible and well-balanced on the hat. It’s important to choose a location that allows the embroidery to stand out without being obstructed by seams or other elements of the hat.
Sizing is another important factor to consider. The size of the embroidery should be proportionate to the hat and not overwhelm the overall design. Too small, and the embroidery may go unnoticed, while too large can make the hat look crowded.
To help you achieve the perfect placement and sizing, here are a few tips:
- Measure Twice, Embroider Once: Before starting the embroidery, take precise measurements of the hat to determine the ideal placement and size for the design.
- Consider Hat Style: Different hat styles may require different placement and sizing techniques. For example, a baseball cap may have a different sweet spot for embroidery than a bucket hat.
- Mock-Up the Design: Use a digital or physical mock-up of the design on the hat to visualize how it will look and make any necessary adjustments.
- Test on a Scrap Fabric: If you’re unsure about the placement or size, test the design on a scrap fabric that is similar to the hat material to see how it looks before embroidering on the actual hat.
Remember, finding the right placement and sizing for your embroidery can greatly enhance the overall look of the hat and make your design stand out.
Conclusion
In conclusion, embroidery designs offer a creative and personalized way to enhance the look of hats. Whether you prefer bold and vibrant designs or subtle and elegant patterns, there are endless possibilities to explore. With the right design and technique, you can transform a plain hat into a unique and stylish accessory. So, why not unleash your creativity and start experimenting with embroidery designs for hats today?
Frequently Asked Questions
Can I embroider on any type of hat?
While it is possible to embroider on various types of hats, it is important to consider the material and structure of the hat. Some hats may be more suitable for embroidery than others. It is recommended to choose hats made of fabric or materials that can withstand the embroidery process.
What type of thread should I use for hat embroidery?
For hat embroidery, it is recommended to use polyester or rayon embroidery thread. These threads are durable, have a nice sheen, and can withstand repeated washing. It is important to choose a thread color that complements the hat design.
How do I prepare a hat for embroidery?
Before embroidering on a hat, it is important to stabilize the fabric to prevent puckering or distortion. This can be done by using a stabilizer, such as tear-away or cut-away stabilizer, and hooping the hat securely. It is also recommended to clean the hat and remove any dirt or debris before starting the embroidery process.
Can I machine wash a hat with embroidered design?
Most embroidered hats can be machine washed, but it is important to follow the care instructions provided by the manufacturer. It is recommended to turn the hat inside out and use a gentle cycle with cold water. Avoid using bleach or harsh detergents that can damage the embroidery.
How can I ensure proper embroidery placement and sizing on a hat?
To ensure proper embroidery placement and sizing on a hat, it is recommended to use templates or markings to guide the embroidery placement. Measure and mark the desired placement area before hooping the hat. It is also important to consider the hat’s shape and size when determining the embroidery size.
Can I create custom designs for hat embroidery?
Yes, you can create custom designs for hat embroidery. There are various software programs and online platforms available that allow you to create and digitize your own embroidery designs. You can also work with a professional embroidery digitizer to bring your custom design ideas to life.